



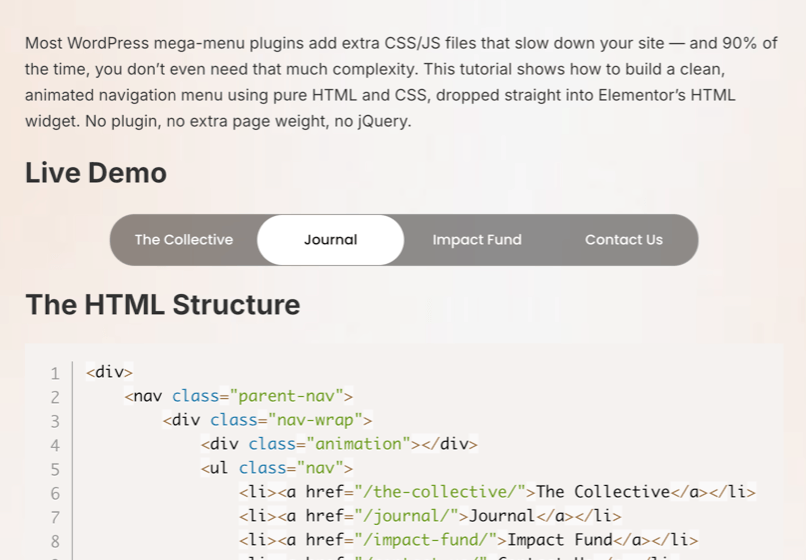
Most WordPress mega-menu plugins add extra CSS/JS files that slow down your site — and 90% of the time, you don’t even need that much complexity. This tutorial shows how to build a clean, animated navigation menu using pure HTML and CSS, dropped straight into Elementor’s HTML widget. No plugin, no extra page weight, no jQuery.
Live Demo
The HTML Structure
					<div>
    <nav class="parent-nav">
        <div class="nav-wrap">
            <div class="animation"></div>
            <ul class="nav">
                <li><a href="/the-collective/">The Collective</a></li>
                <li><a href="/journal/">Journal</a></li>
                <li><a href="/impact-fund/">Impact Fund</a></li>
                <li><a href="/contact-us/">Contact Us</a></li>
            </ul>
        </div>
    </nav>

    <style>
        @import url('https://fonts.googleapis.com/css2?family=Poppins:wght@400;500;600&display=swap');

        * {
            box-sizing: border-box;
        }

        nav.parent-nav {
            width: 100%;
            max-width: 590px;
            margin: 2px auto 0;
            position: relative;
            backdrop-filter: blur(16px) saturate(180%);
            -webkit-backdrop-filter: blur(16px) saturate(180%);
            background-color: rgba(0, 0, 0, 0.5);
            border-radius: 25px;
            border: 1px solid rgba(255, 255, 255, 0.125);
            overflow: hidden;
        }

        .nav-wrap {
            position: relative;
        }

        ul.nav {
            position: relative;
            height: 50px;
            font-family: 'Poppins', sans-serif;
            font-weight: 500;
            display: flex;
            align-items: center;
            padding: 0;
            margin: 0;
            list-style: none;
            z-index: 2;
        }

        ul.nav li {
            flex: 1;
            position: relative;
            z-index: 2;
        }

        ul.nav a {
            height: 50px;
            font-size: 14px;
            display: flex;
            align-items: center;
            justify-content: center;
            text-decoration: none;
            color: white;
            transition: color 0.3s ease;
            position: relative;
            z-index: 2;
        }

        ul.nav li.active a,
        ul.nav li.hover a {
            color: black;
        }

        .animation {
            position: absolute;
            top: 0;
            left: 0;
            width: 0;
            height: 50px;
            border-radius: 25px;
            background-color: #ffffff;
            opacity: 0;
            transition: all 0.35s ease;
            z-index: 1;
        }

        html {
            scroll-behavior: smooth;
        }
    </style>

    <script>
        document.addEventListener('DOMContentLoaded', () => {
            const nav = document.querySelector('.nav');
            const navItems = document.querySelectorAll('.nav li');
            const navLinks = document.querySelectorAll('.nav li a');
            const animation = document.querySelector('.animation');

            let activeItem = null;
            let hasInteracted = false;

            function moveAnimation(target) {
                if (!target) {
                    animation.style.width = '0px';
                    animation.style.left = '0px';
                    animation.style.opacity = '0';
                    return;
                }

                animation.style.width = target.offsetWidth + 'px';
                animation.style.left = target.offsetLeft + 'px';
                animation.style.opacity = '1';
            }

            function setActive(targetItem) {
                navItems.forEach(item => item.classList.remove('active'));

                if (targetItem) {
                    targetItem.classList.add('active');
                    activeItem = targetItem;
                    moveAnimation(targetItem);
                } else {
                    activeItem = null;
                    moveAnimation(null);
                }
            }

            navItems.forEach(item => {
                item.addEventListener('mouseenter', () => {
                    navItems.forEach(i => i.classList.remove('hover'));
                    item.classList.add('hover');
                    moveAnimation(item);
                });
            });

            nav.addEventListener('mouseleave', () => {
                navItems.forEach(i => i.classList.remove('hover'));
                moveAnimation(activeItem);
            });

            navLinks.forEach(link => {
                link.addEventListener('click', () => {
                    hasInteracted = true;
                    setActive(link.parentElement);
                });
            });

            window.addEventListener('scroll', () => {
                hasInteracted = true;
            }, { passive: true });

            const sections = [...navLinks]
                .map(link => document.querySelector(link.getAttribute('href')))
                .filter(Boolean);

            const observer = new IntersectionObserver((entries) => {
                if (!hasInteracted) return;

                const visibleSections = entries.filter(entry => entry.isIntersecting);
                if (!visibleSections.length) return;

                const mostVisible = visibleSections.sort((a, b) => {
                    return b.intersectionRatio - a.intersectionRatio;
                })[0];

                const id = mostVisible.target.id;
                const matchedLink = document.querySelector(`.nav a[href="#${id}"]`);

                if (matchedLink) {
                    setActive(matchedLink.parentElement);
                }
            }, {
                threshold: 0.5
            });

            sections.forEach(section => observer.observe(section));

            setActive(null);
        });
    </script>
</div>
How It Works
- Flexbox layout —
display: flexwithgapkeeps menu items evenly spaced without margin hacks. - The underline animation — the
::afterpseudo-element starts atwidth: 0and expands to100%on hover, powered entirely by a CSStransition. No JavaScript involved. - Brand color on hover — the link color and underline both shift to the accent color, giving instant visual feedback.
- Responsive fallback — on smaller screens,
flex-wrap: wrapstacks the items instead of squeezing them into one row.
How to Add This in Elementor
- Drag an HTML widget onto your section.
- Paste the HTML code above into the widget.
- Go to your theme’s Custom CSS panel (or Elementor’s page-level Custom CSS) and paste the CSS.
- Replace the menu labels and
hreflinks with your own pages. - Adjust
#DF4826to match your own brand color if needed.
Customization Ideas
- Add a dropdown by nesting a
<ul>inside a<li>and showing it with:hover. - Swap the underline for a background-fill animation by animating
background-sizeinstead ofwidth. - Use
clamp()onfont-sizefor smoother scaling across breakpoints instead of a hard media query.
Final Thoughts
A hand-coded menu like this loads instantly, has zero plugin dependency, and gives you full control over the animation — exactly the kind of lightweight approach that keeps Elementor sites fast. If you want this built into your live site with your exact brand styling, feel free to reach out — I build custom Elementor components like this regularly.